

Easy No-Bake Butterfinger Pie Recipe That’s Irresistible
Easy No-Bake Butterfinger Pie Recipe :As the sun sets, a sweet craving often takes over. The mix of crunchy Butterfinger candy and smooth peanut butter filling is irresistible. This Easy No-Bake Butterfinger Pie is like a party in your mouth, with every bite bursting with flavors and textures.
Table of Contents
Key Takeaways
- Discover a delectable no-bake Butterfinger Pie recipe that can be prepared in under 10 minutes.
- This creamy, crunchy dessert combines Butterfinger candy bars with a luscious filling, nestled in a cookie crust.
- Perfect for satisfying sweet cravings without spending hours in the kitchen.
- A versatile and crowd-pleasing treat suitable for any occasion, from family gatherings to movie nights.
- Minimal effort required to mix and assemble the ingredients, making it a time-saving solution for busy days.
Why This No-Bake Dessert Will Become Your New Favorite
Try the Butterfinger Pie, a no-bake treat perfect for any event. It mixes creamy peanut butter, crunchy Butterfinger candies, and a rich cookie crust. This mix creates a flavor explosion that will make you want more.
Perfect for Any Occasion
This Butterfinger Pie is great for family gatherings, potluck parties, or just a sweet treat. It’s perfect for holidays, birthdays, or whenever you want a delicious butterfinger dessert or peanut butter candy pie.
Minimal Effort, Maximum Flavor
Making this no-bake dessert is easy and quick. With a few ingredients and a simple assembly, you get a rich, creamy, and crunchy treat. It’s sure to satisfy your taste buds.
Time-Saving Solution
Finding time to bake can be hard in today’s world. This no-bake Butterfinger Pie is a quick fix. Just mix, chill, and serve – it’s that simple!
Enjoy the rich flavors of this butterfinger dessert. Let peanut butter, Butterfinger, and a decadent cookie crust become your new favorite treat.
Essential Ingredients for Your Butterfinger Pie Recipe
Making the perfect Butterfinger pie starts with the right ingredients. This no-bake dessert needs a mix of flavors and textures. The butterfinger pie ingredients are key, including:
- Crushed graham crackers or Oreo cookies for the crust
- Creamy peanut butter for a rich, nutty taste
- Cream cheese for a smooth filling
- Powdered sugar to sweeten it
- Whipped topping, like Cool Whip, for a light texture
- Semi-sweet chocolate chips for chocolate indulgence
- Butterfinger candy bars, crushed, for crunch and flavor
Some recipes might add vanilla pudding mix and heavy whipping cream. These ingredients make the filling even creamier. By choosing and mixing these butterfinger pie ingredients carefully, you can make a dessert that looks great and tastes amazing.
“The secret to a truly exceptional Butterfinger pie lies in the perfect balance of sweet, creamy, and crunchy elements.”
Creating the Perfect Cookie Crust Base
When making the ultimate butterfinger pie crust, you can choose between Oreo or graham cracker. Each option brings a unique taste that can make your no-bake dessert even better.
Choosing Between Oreo and Graham Cracker Options
The Oreo crust has a deep chocolate flavor that goes well with peanut butter and butterfinger. To make it, blend Oreo cookies into fine crumbs in a food processor. Mix these crumbs with melted butter and a bit of salt. Press the mix firmly into a 9-inch pie dish.
For a traditional graham cracker crust, crush the crackers into fine crumbs. Mix the crumbs with melted butter and press them into the pie dish. Make sure it’s even for a solid base.
Proper Crust Assembly Techniques
Choosing the right cookie crust is key. Press the mix firmly into the pie dish, especially the sides and edges. This makes a strong base for your creamy no-bake pie crust filling.
Tips for Even Distribution
- Use a flat-bottomed glass or measuring cup to evenly press the crust into the dish.
- Pay extra attention to the edges, ensuring they are well-packed for a neat, defined crust.
- Chill the crust in the refrigerator for at least 30 minutes before adding the filling to help it set and hold its shape.
Follow these easy steps to make a perfect cookie crust. It will be the ideal base for your rich butterfinger pie filling.
Mixing the Creamy Peanut Butter Filling
Making the creamy peanut butter filling for your Butterfinger cream pie is easy. Start by mixing softened cream cheese, creamy peanut butter, powdered sugar, and a bit of vanilla extract in a big bowl. Use a hand mixer or food processor to blend until it’s smooth and creamy.
For more indulgence, add a package of instant vanilla pudding mix whisked with cold milk. This makes the filling even creamier. It will match perfectly with the crunch of crushed Butterfinger candies.
Make sure to mix the filling well and avoid lumps. The secret to a silky-smooth filling is to whip the ingredients until they’re well mixed and light.
| Ingredient | Quantity |
|---|---|
| Cream cheese, softened | 8 oz |
| Creamy peanut butter | 1 cup |
| Powdered sugar | 1 1/4 cup |
| Vanilla extract | 1 tsp |
| Instant vanilla pudding mix (optional) | 1 package |
| Cold milk (optional) | 1 cup |
With the perfect peanut butter filling ready, you’re almost there. Now, add the crushed Butterfinger candies for the ultimate texture and flavor.
How to Incorporate Butterfinger Candies
Make your no-bake Butterfinger crunch pie even better by adding the famous candy bar. It’s all about getting the right texture and layering. This way, your dessert will be full of Butterfinger taste in every bite.
Crushing Methods for Perfect Texture
Start by crushing your Butterfinger candies to the right size. You can use a rolling pin, a food processor, or even a bag and a rolling pin or meat mallet. Aim for a mix of big chunks and small crumbs for texture and taste in your pie.
Layering Techniques for Best Results
After crushing the Butterfingers, mix some into your peanut butter filling and save some for the top. Spread the filling over your cookie crust, then add more crushed Butterfinger candies. Keep layering for a pie full of Butterfinger flavor.
The secret to a great Butterfinger crunch pie is mixing flavors and textures well. By adding crushed candy to both the filling and the top, every bite will be a mix of peanut butter, chocolate, and that amazing Butterfinger crunch.
Chilling and Setting Instructions
To make your no-bake Butterfinger pie stand out, follow these chilling and setting steps. First, mix the creamy peanut butter filling and layer the crushed Butterfinger candies. Then, let the pie chill and set.
Begin by covering the pie with plastic wrap. Refrigerate it for at least 4 hours, or until it’s fully set. This step boosts the flavors and keeps the pie’s shape. For a firmer texture, freeze it for 6-12 hours.
When it’s time to serve, take the pie out of the fridge or freezer. Let it soften at room temperature for 20-30 minutes. This makes the filling creamy and easy to slice. Your no-bake Butterfinger pie is now ready to enjoy!
| Chilling Time | Freezing Time | Set Time | Softening Time |
|---|---|---|---|
| At least 4 hours | 6-12 hours | Completely set | 20-30 minutes |
Remember, chilling and setting your no-bake Butterfinger pie right is key. It makes your dessert delicious and perfect in texture. Your guests will beg for more.
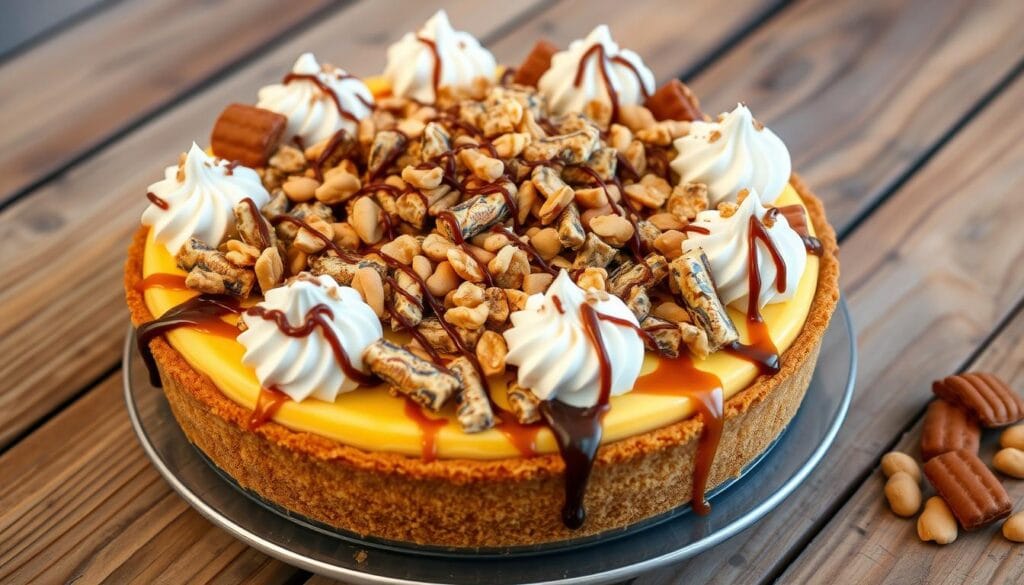
Creative Topping Ideas and Presentation Tips
Make your Butterfinger pie stand out with creative toppings and presentation. Try drizzling melted chocolate or caramel syrup for extra sweetness. Top it with whipped cream rosettes, crushed Butterfinger, or sea salt for a mix of flavors and textures.
Decorative Drizzling Techniques
Decorate your Butterfinger pie with drizzling. Melt chocolate or caramel and use a spoon or piping bag for designs. Try zig-zags, spirals, or abstract shapes to make it eye-catching.
Garnishing Options
- Whipped cream rosettes: Pipe swirls of fresh whipped cream around the pie’s edge or in the center for elegance.
- Crushed Butterfinger pieces: Sprinkle crushed Butterfinger on top for extra flavor and crunch.
- Sea salt: A light dusting of sea salt adds a subtle contrast to the pie’s sweetness, enhancing the flavor.
Be creative with your Butterfinger pie presentation to wow your guests. These decorative elements turn a simple dessert into a stunning masterpiece that delights everyone.
Storage Tips and Make-Ahead Options
Proper storage and make-ahead preparation are crucial for your butterfinger pie. This no-bake dessert is not only delicious but also easy to prepare in advance.
To store leftover butterfinger pie, cover it with plastic wrap or foil and refrigerate. It can stay fresh in the fridge for up to 3 days. For longer storage, place it in an airtight container and freeze for up to a month.
This make-ahead dessert is perfect for busy schedules. Prepare it ahead, let it chill, and serve when ready. You’ll have a decadent treat that everyone will love.
“This butterfinger pie is a life-saver for any occasion – it’s easy to make, can be prepared ahead of time, and is simply irresistible!”
With these tips, you can enjoy this butterfinger pie whenever you want. Just plan ahead and let this no-bake delight impress your guests.
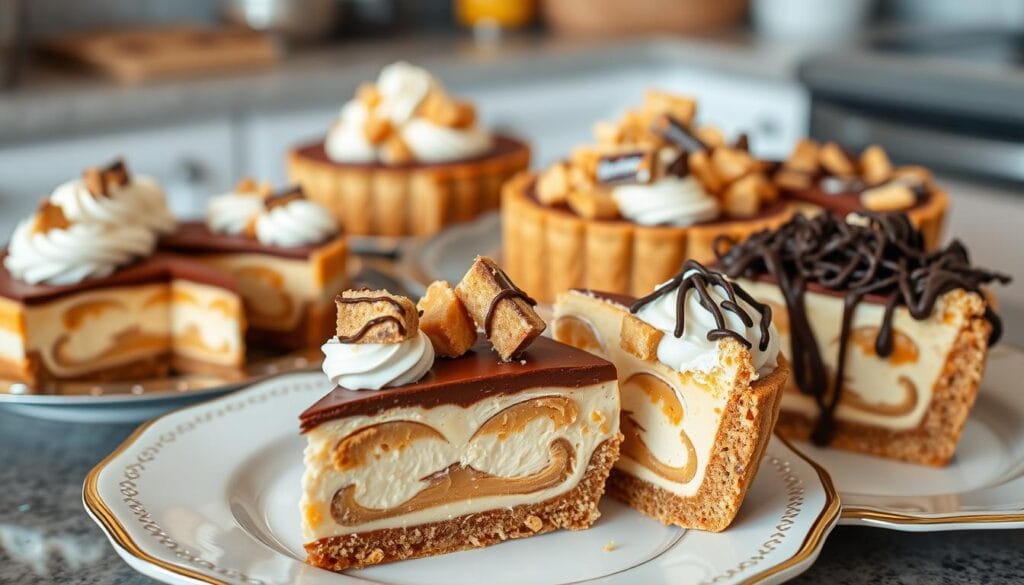
Recipe Variations and Substitutions
Make your Butterfinger pie even better by trying out different butterfinger pie variations and candy bar pie alternatives. You can use Reese’s cups, Snickers, or Heath bars for new tastes. For a chocolatey kick, try a chocolate cookie crust instead of graham crackers.
Want a lighter pie? Use low-fat cream cheese or Greek yogurt instead of full-fat. You can also adjust the sweetness by changing the powdered sugar or using sugar-free pudding. There are many ways to make your Butterfinger pie just right for you.
- Reese’s Cup Butterfinger Pie: Swap Butterfinger candies for peanut butter cups for a tasty mix of peanut butter and chocolate.
- Snickers Pie: Use chopped Snickers bars for a caramel-filled twist.
- Heath Bar Crunch Pie: Add crushed Heath bars to the filling for a toffee crunch.
- Chocolate Cookie Crust: Choose a chocolate cookie crust for an extra chocolatey base.
- Low-Fat Version: Use low-fat cream cheese or Greek yogurt for a lighter treat.
Choosing any of these paths will lead to a delicious and loved dessert. Your taste buds will thank you. Get creative and try out the many butterfinger pie variations and candy bar pie alternatives to make your pie special.
Conclusion
This easy no-bake Butterfinger Pie is a delightful treat. It mixes the famous Butterfinger taste with a creamy peanut butter filling. Plus, it has a crunchy crust. It’s perfect for any event, saving you time while offering great flavor.
Looking for a quick dessert for a party, potluck, or family get-together? This Butterfinger Pie will wow everyone. Its tasty flavor and easy prep make it a favorite to make again and again.
Ready to try this easy no-bake Butterfinger Pie? Just get your ingredients and follow the steps. You’ll enjoy the yummy flavors and your guests will ask for the recipe.
FAQ
What is the key ingredient in this Butterfinger Pie recipe?
The key ingredient is the Butterfinger candy bars. They give the pie its crunchy and peanut butter flavor.
Can I use a different type of cookie crust besides graham crackers or Oreos?
Yes, you can try different cookie crusts. Options include chocolate cookie crumbs or a traditional pie dough crust.
How long does it take to make this no-bake Butterfinger Pie?
This Butterfinger Pie is quick to make. It can be prepared in under 10 minutes.
Can I make this Butterfinger Pie ahead of time?
Absolutely, this pie is great for making ahead. It needs at least 4 hours of chilling or 6-12 hours of freezing to set.
What variations can I try with this Butterfinger Pie recipe?
You can swap out Butterfinger for other candy bars like Reese’s cups or Snickers. Try different pudding flavors or a chocolate cookie crust for a twist.
How should I store leftover Butterfinger Pie?
Store leftover pie covered in the fridge or freezer. For longer storage, use an airtight container.
Can I make a lighter version of this Butterfinger Pie?
Yes, you can make a lighter version. Use low-fat cream cheese or Greek yogurt for a healthier dessert.


